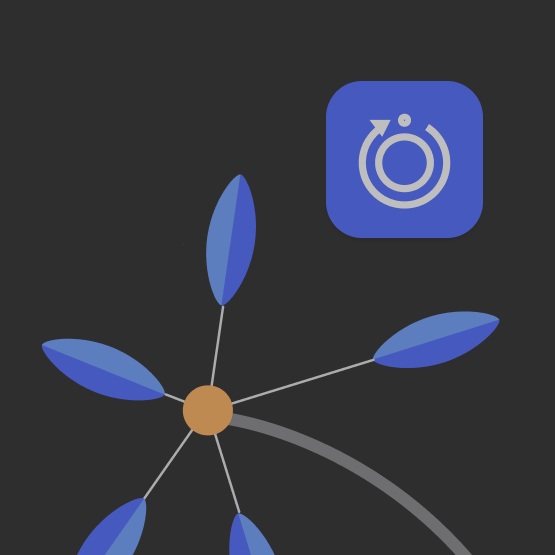
Radial Calculator
A new editing function that makes it possible to quickly and easily arrange elements radially around a point and then customize them.
PROJECT CONTEXT
Application Design & march. – july 2023
TOOLS
Figma, Illustrator
SUPERVISION
Prof. Hartmut Bohnacker, Asisa Asseily
MY ROLE
Research, Concept , UI Design, Prototyping
TEAM MEMBERS
André Jacoby, Elisa Moder, Lena van Maris
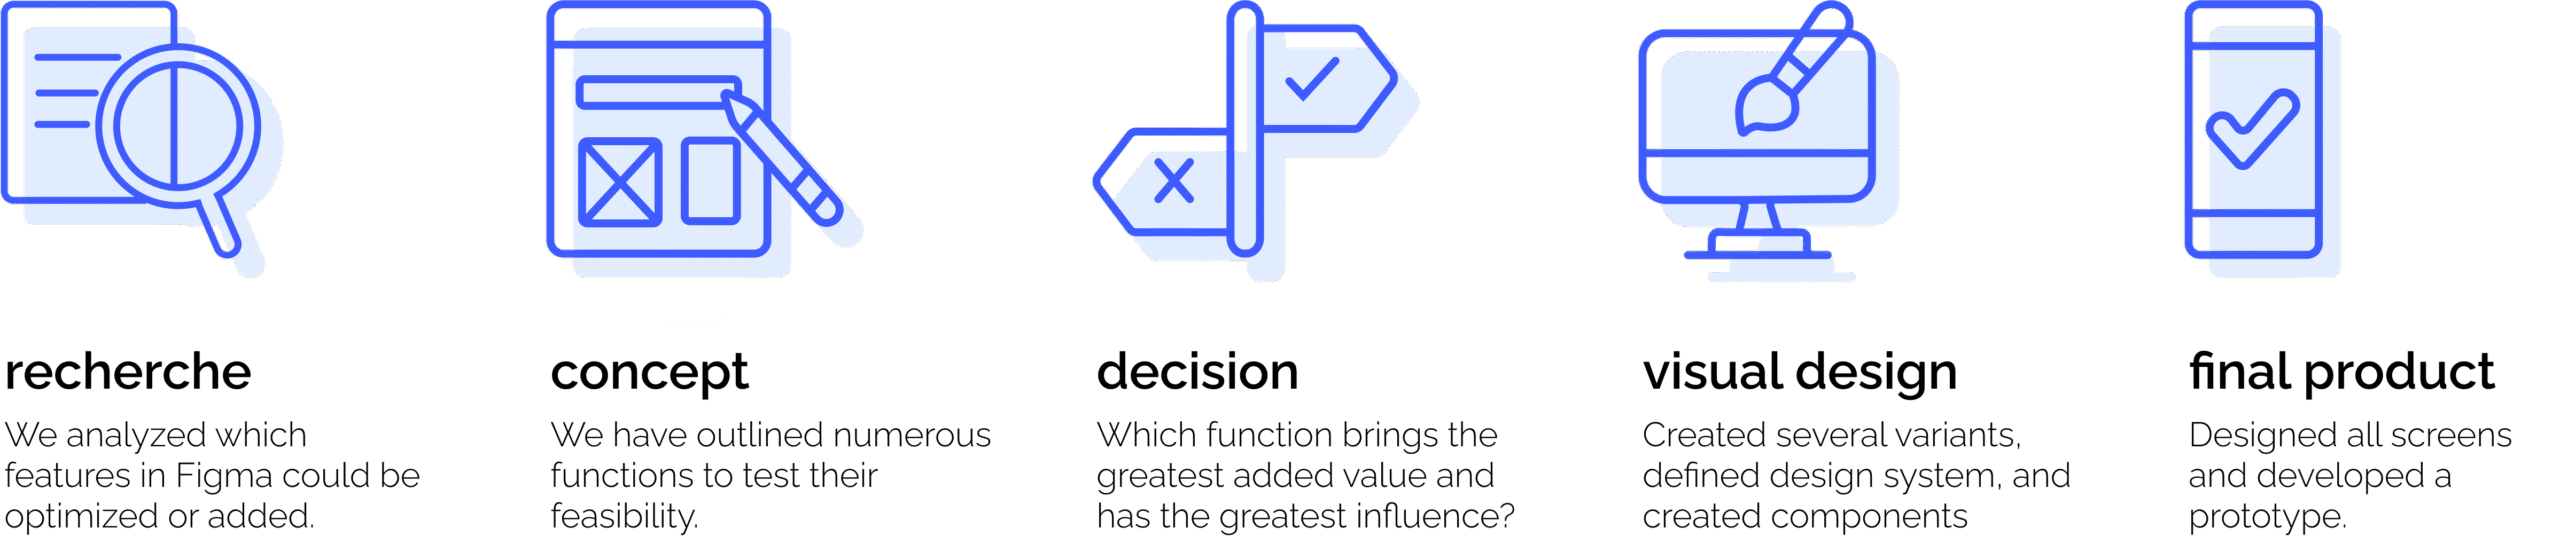
DESIGN
PROCESS
OUR
GOAL
The Application Design course aims to develop an application in the area of search, browse or edit. The task was to find a weak point in this area and improve it through conceptual, functional and visual ideas.
Our goal was to develop an editing function that solves a problem when working with design programs through simple and understandable interaction.
OUR
PAINPOINTS
As we wanted to put the Pathfinder functions to the test in detail, we looked for various illustrations, divided them into levels of difficulty and then recreated them ourselves in Illustrator.
In order to determine at which point and in which work steps there are problems, we observed a person and noted the different work steps and the functions used. In order to determine which of our solution approaches were sensible and feasible, we organised them in a simple matrix. This allowed us to get a feel for which ideas we could pursue further.
Unclear Layer Structure
Volunteers arrived without clear direction and didn’t know where to go, who to talk to, or how to start helping.
Limited Object Placement
Objects can’t be aligned seamlessly, and reusing the same element requires constant copying, which slows down the workflow.
Missing Functions
Key features like rotation around a point, distance checks, or circle symmetry are not available, limiting accuracy and design options.
MAIN
FUNCTION
In order not to lose our focus, we defined three main functions, which we continued to expand as we progressed.
Transition between forms. (tangent)
Symmetry
Radially constructed object
DEFINE
RULES
WHERE ARE THE FIRST AND LAST ELEMENTS LOCATED?
First element at the start angle and last element not at the end angle
Both at end and start angles
Neither at end angle nor start angle
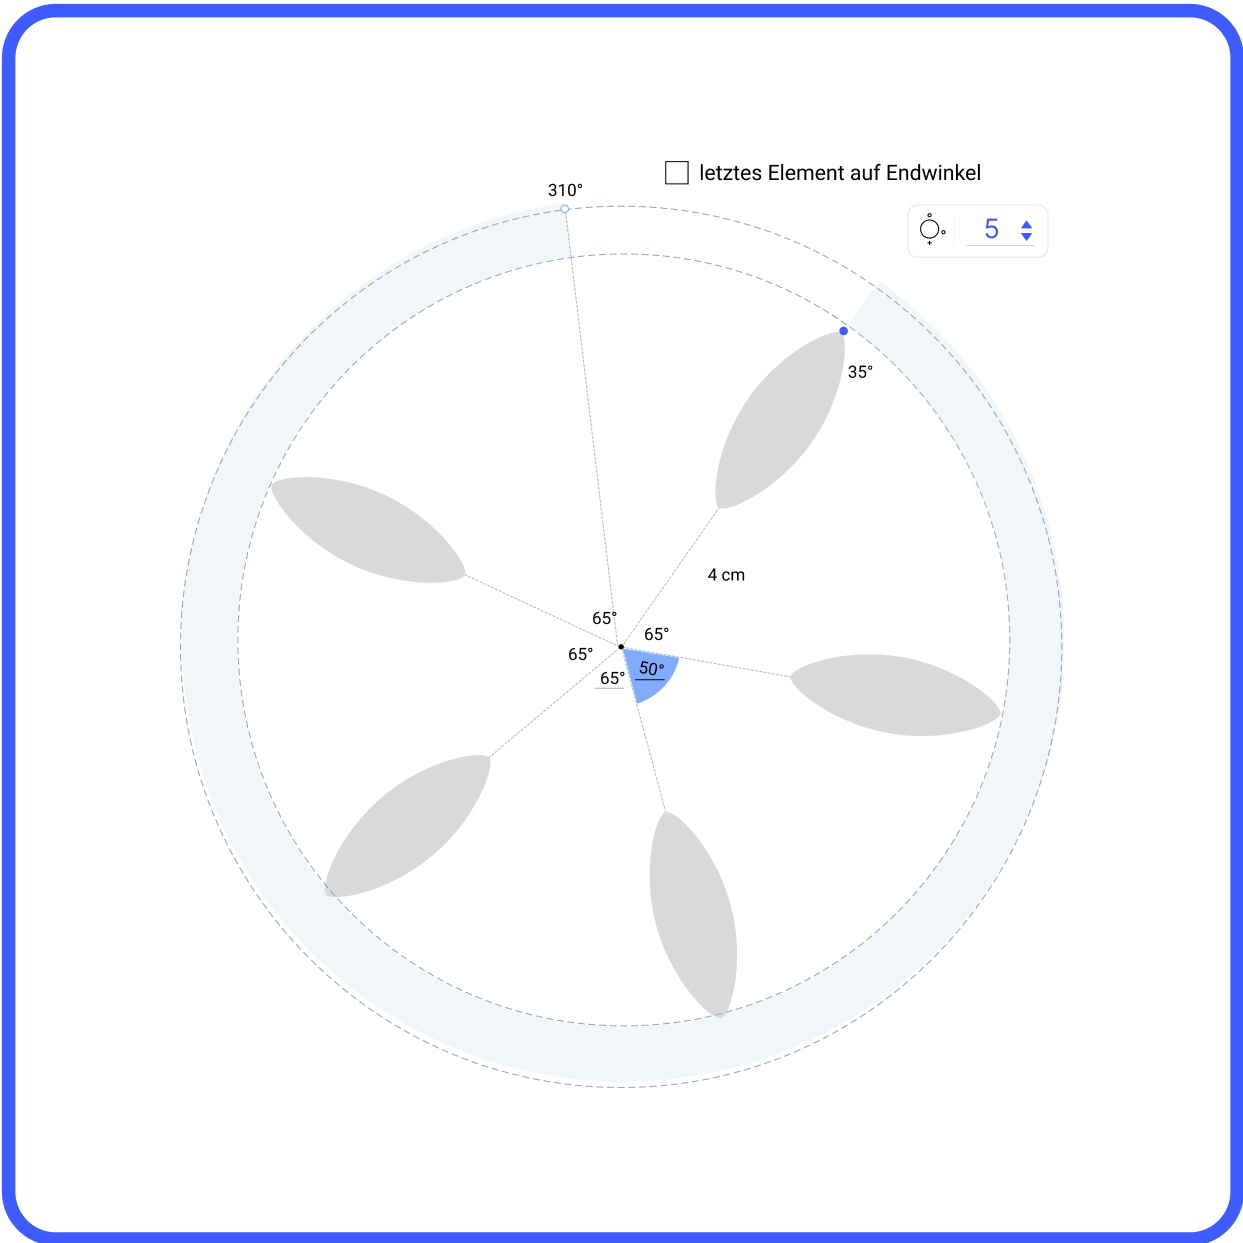
We have therefore specified that the first element is at the start angle and the last element is not by default. A checkbox can be used to set the last element to the end angle.
WHAT HAPPENS IF WE CHANGE THE LAUNCH ANGLE?
All elements are distributed evenly
Elements remain fixed in their position
We determined that all elements are always distributed evenly across the total angle.
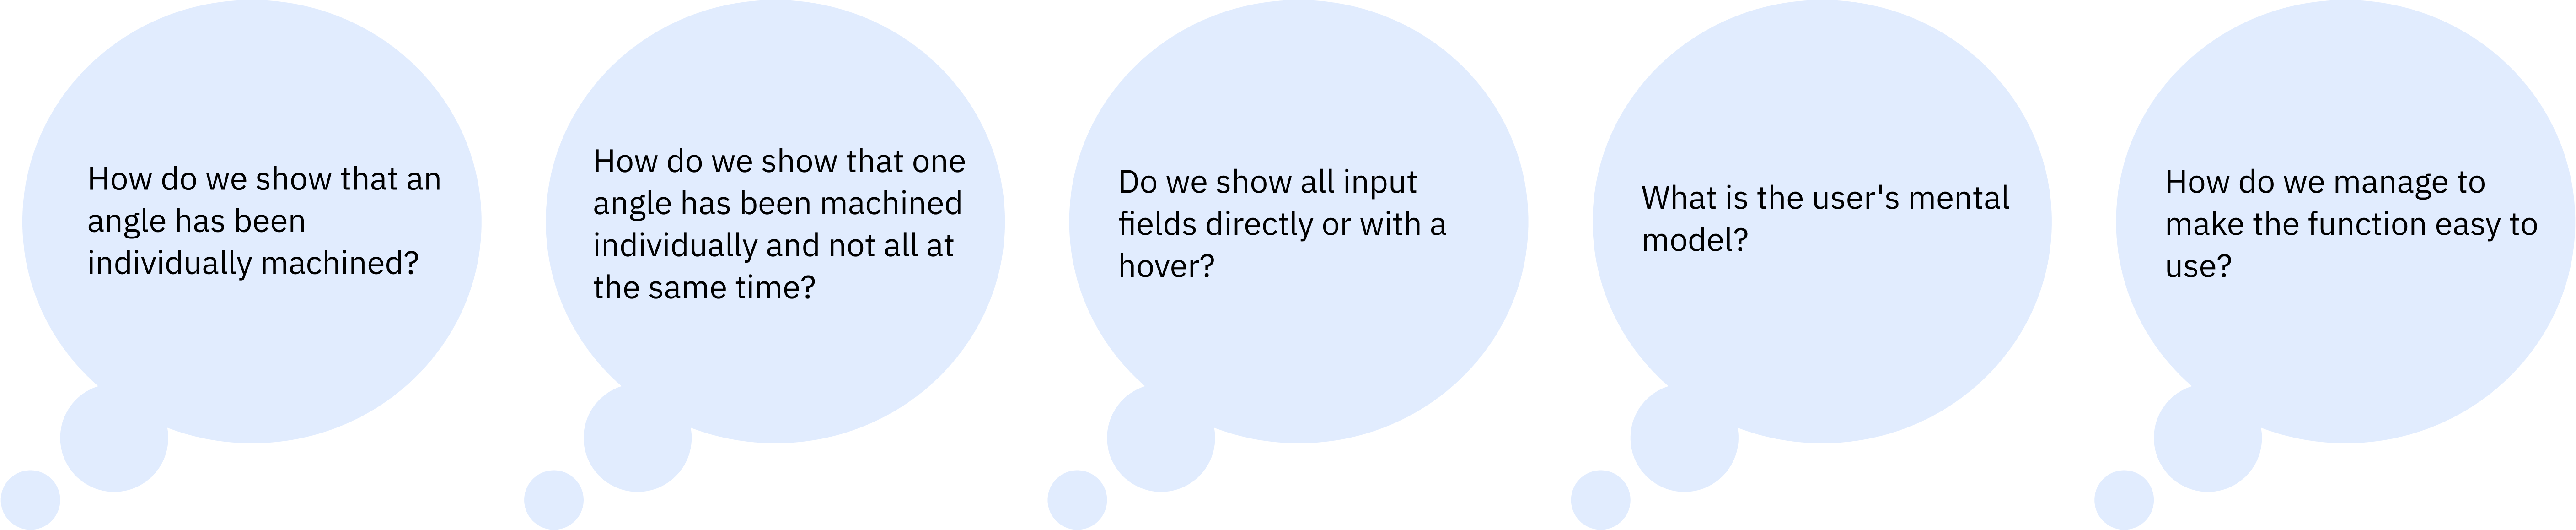
What happens when we edit an angle individually?
The left angle of the machined angle changes.
The end angle changes
When we edit an angle individually, only the selected angle changes and all others remain the same size. This means that the end angle changes and the total angle becomes smaller or larger.
QUESTION
DURING THE DESIGN PROCESS
OUR
FEATURES
01
/05
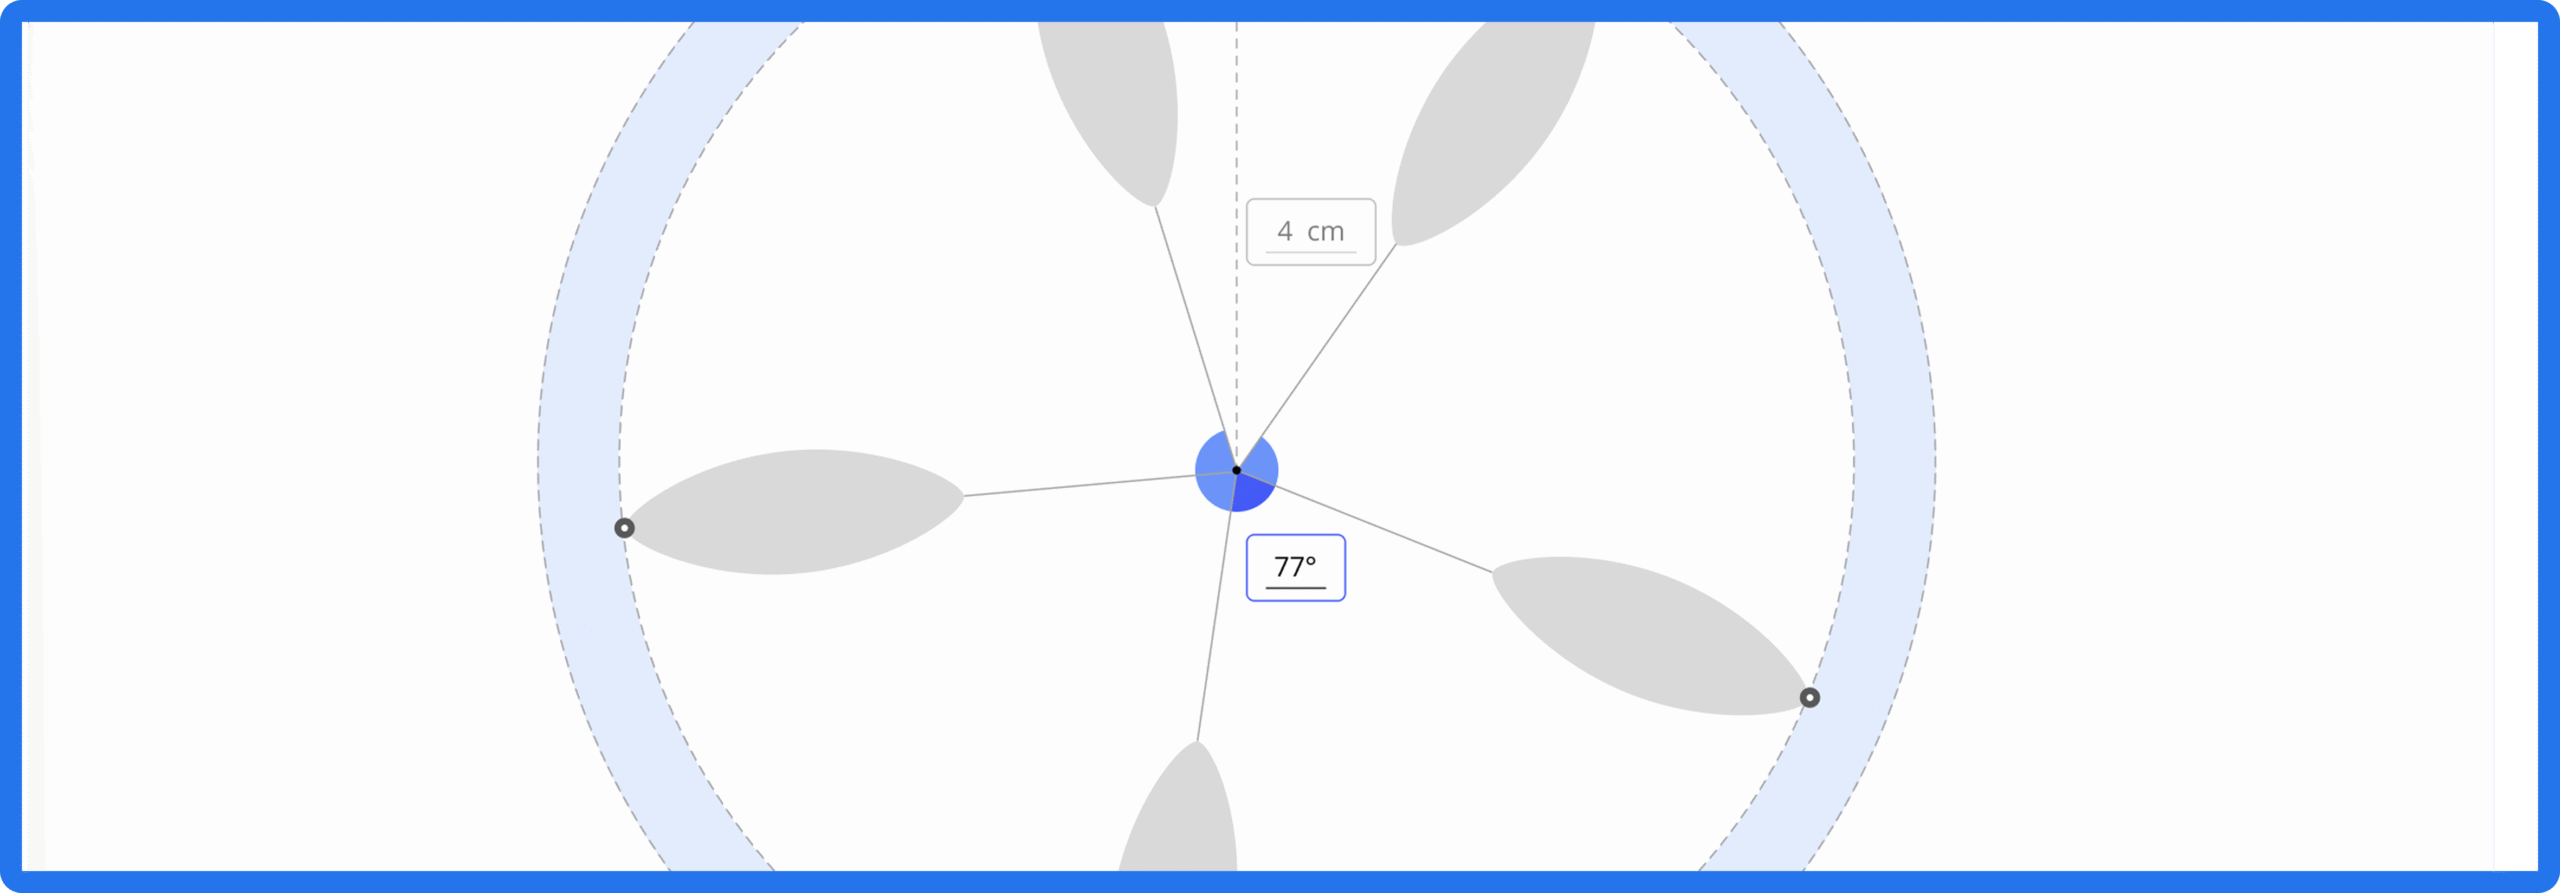
START AND END ANGLES
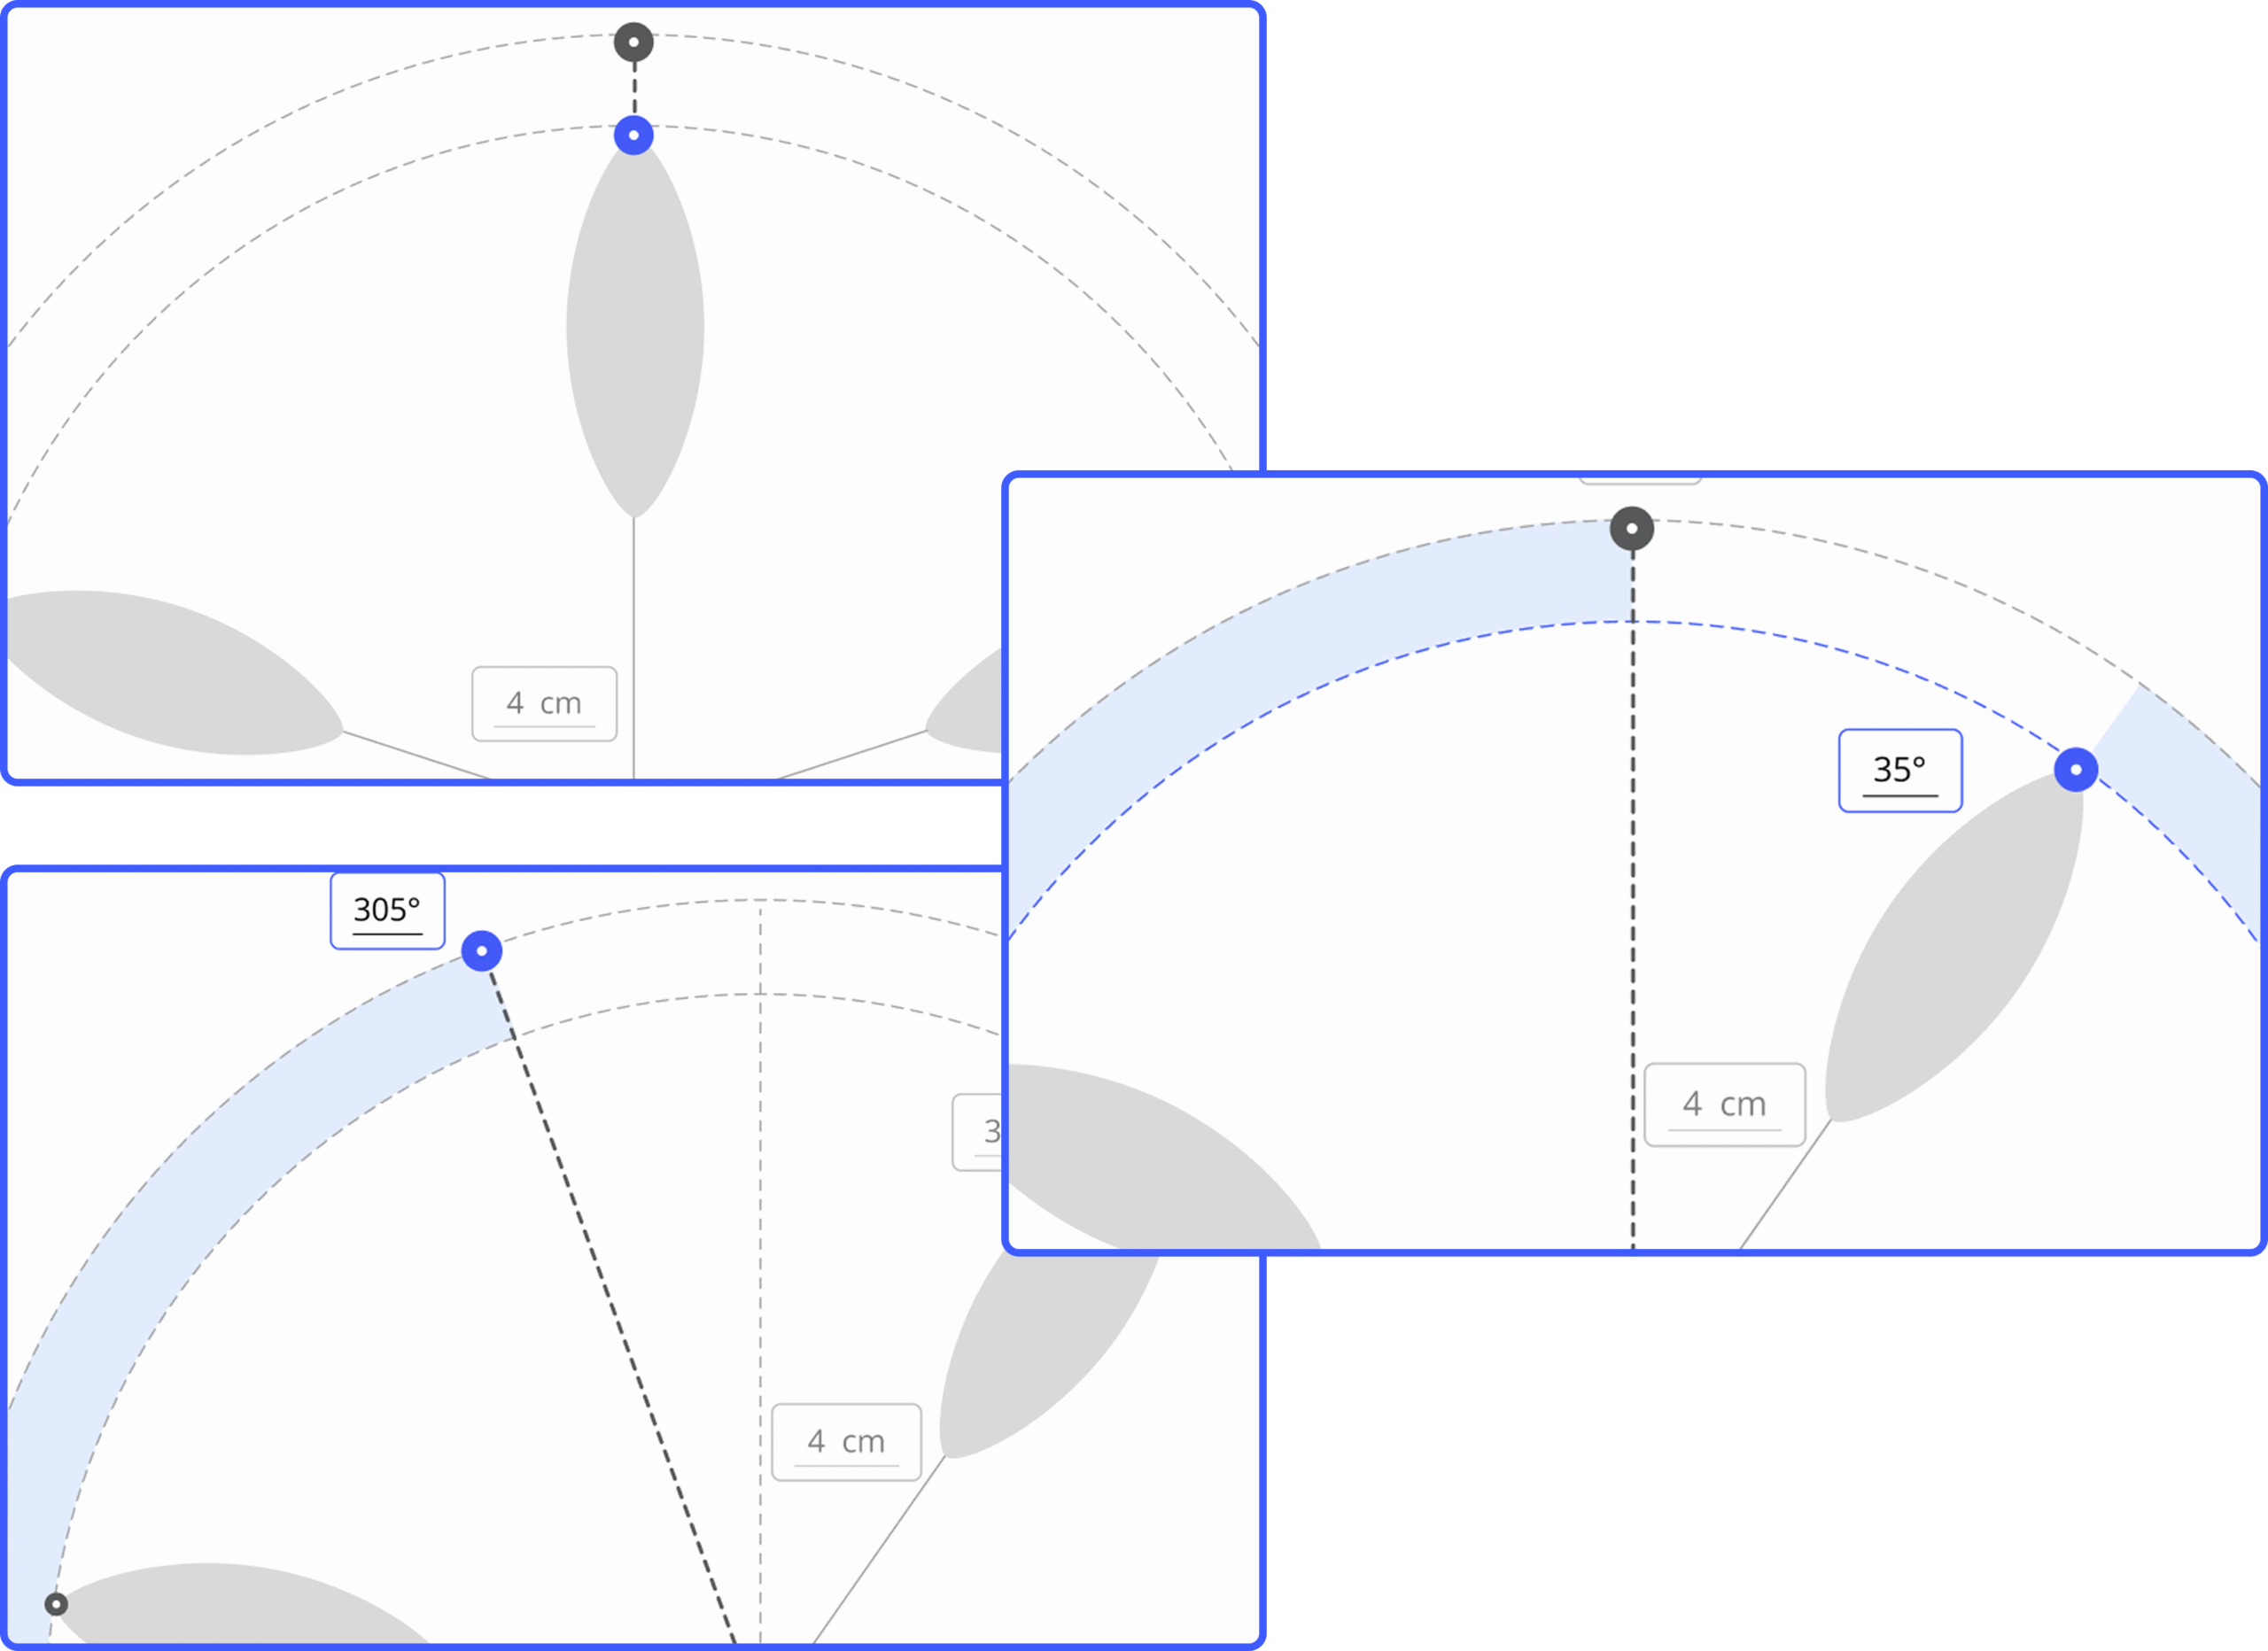
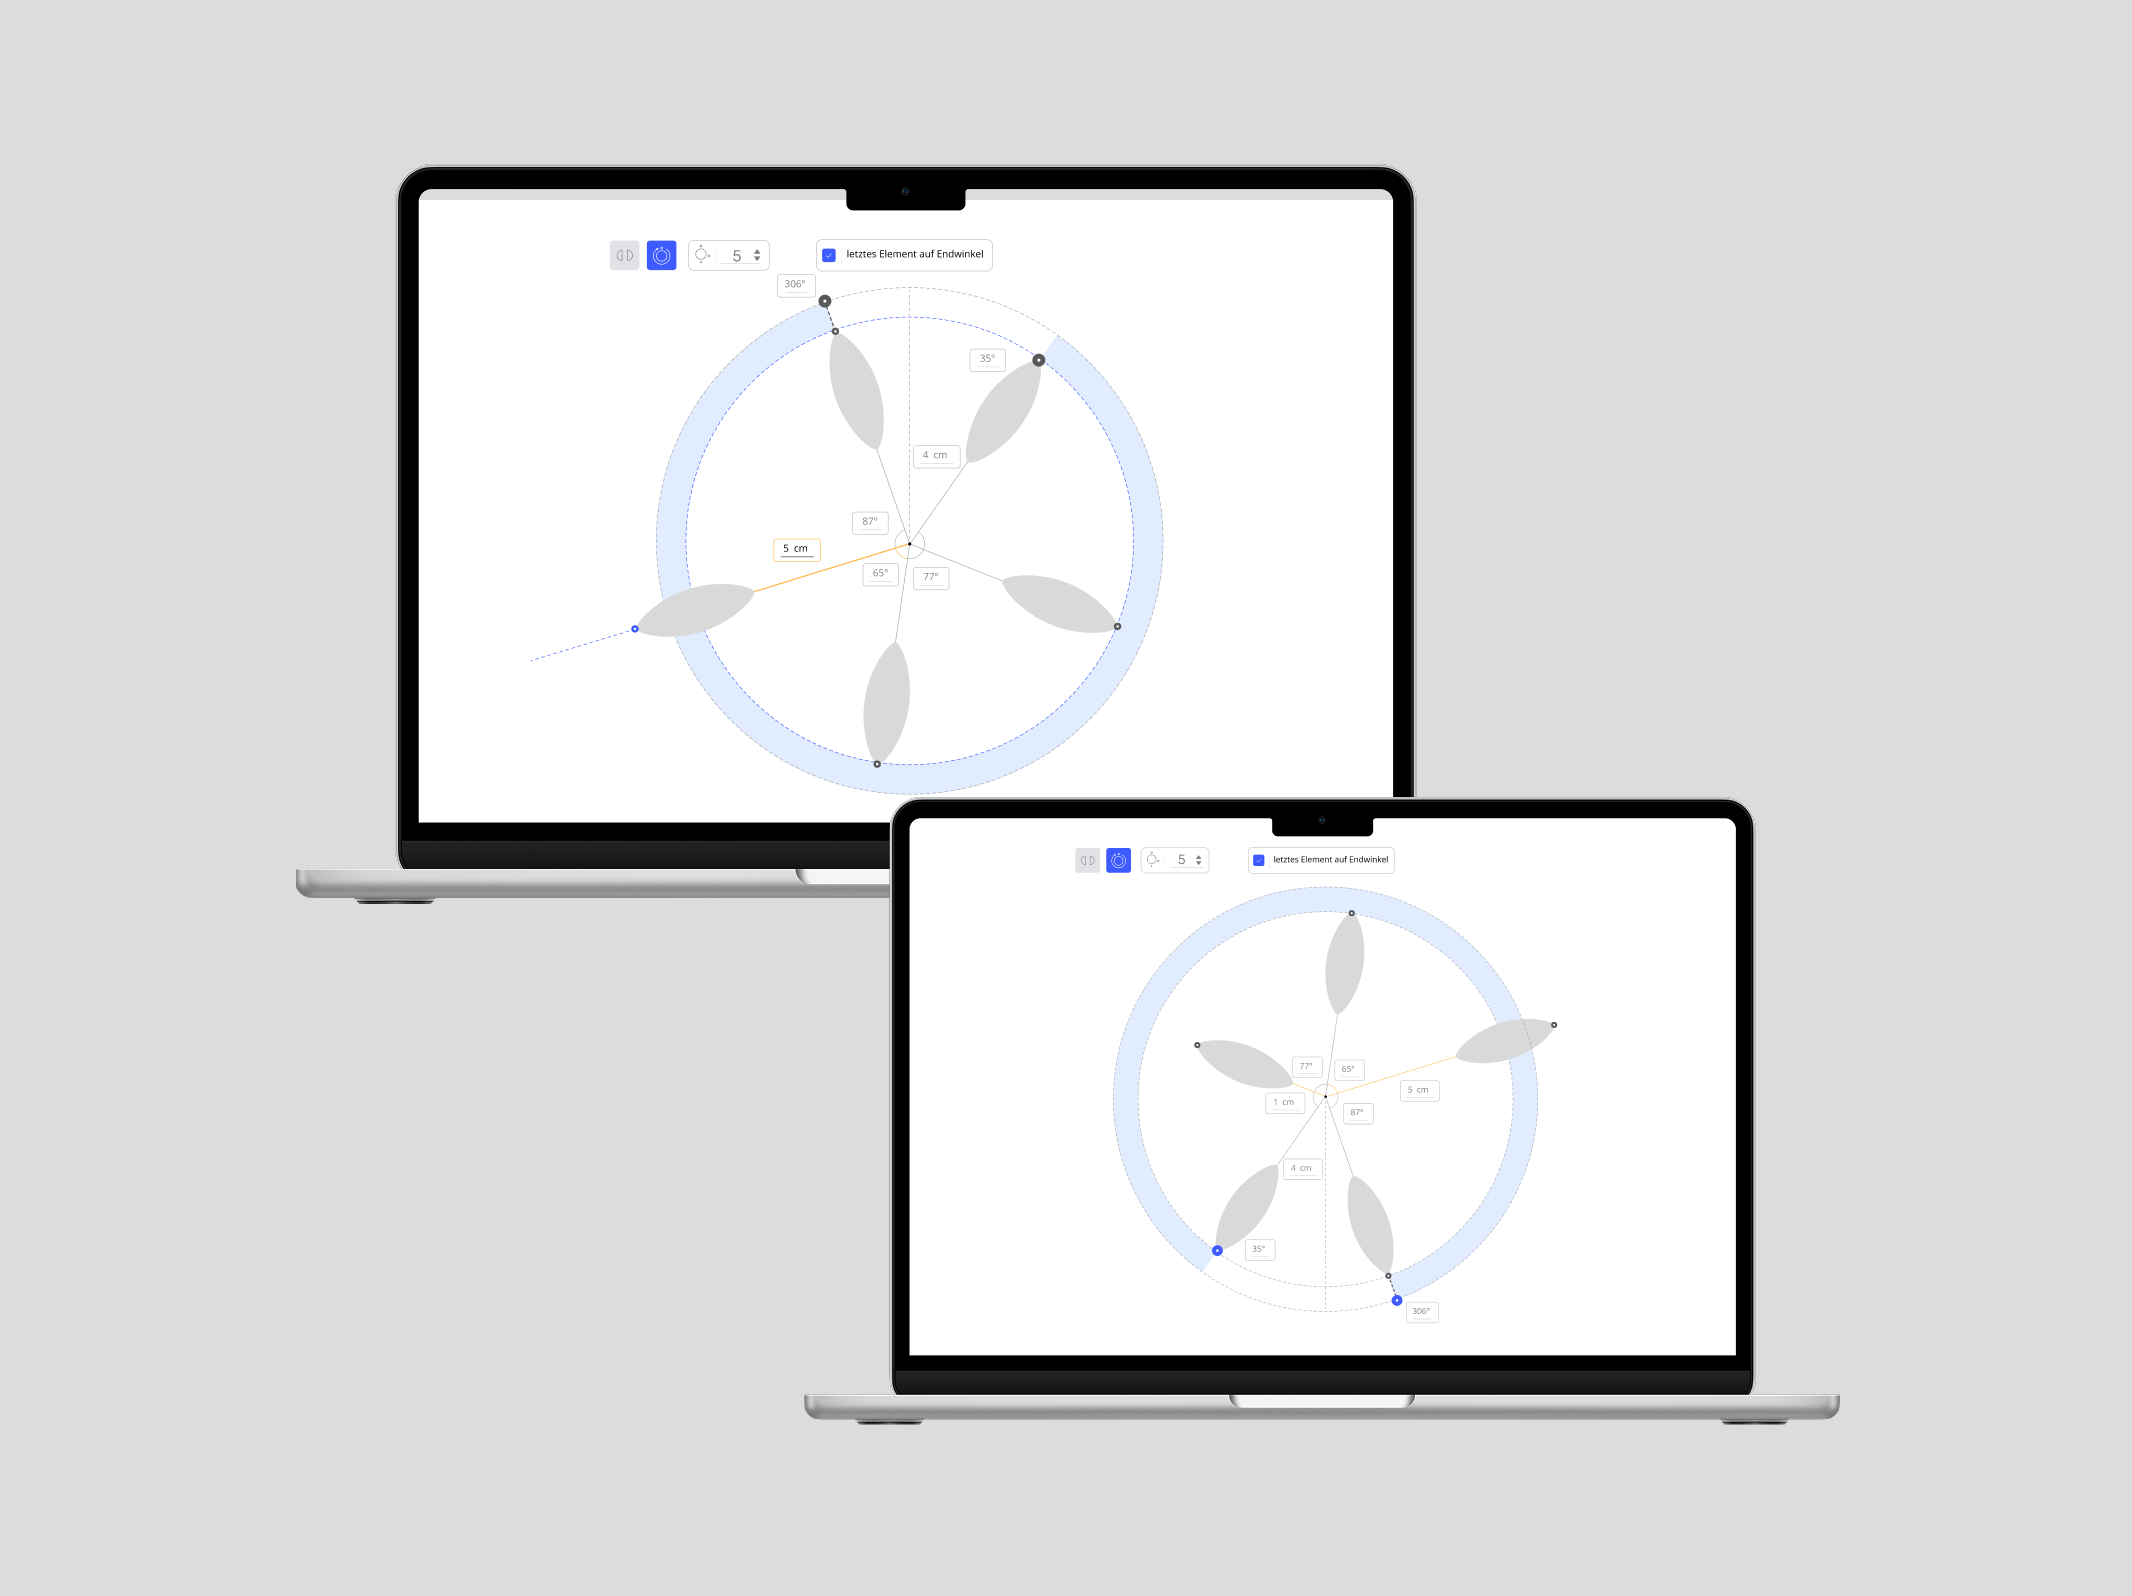
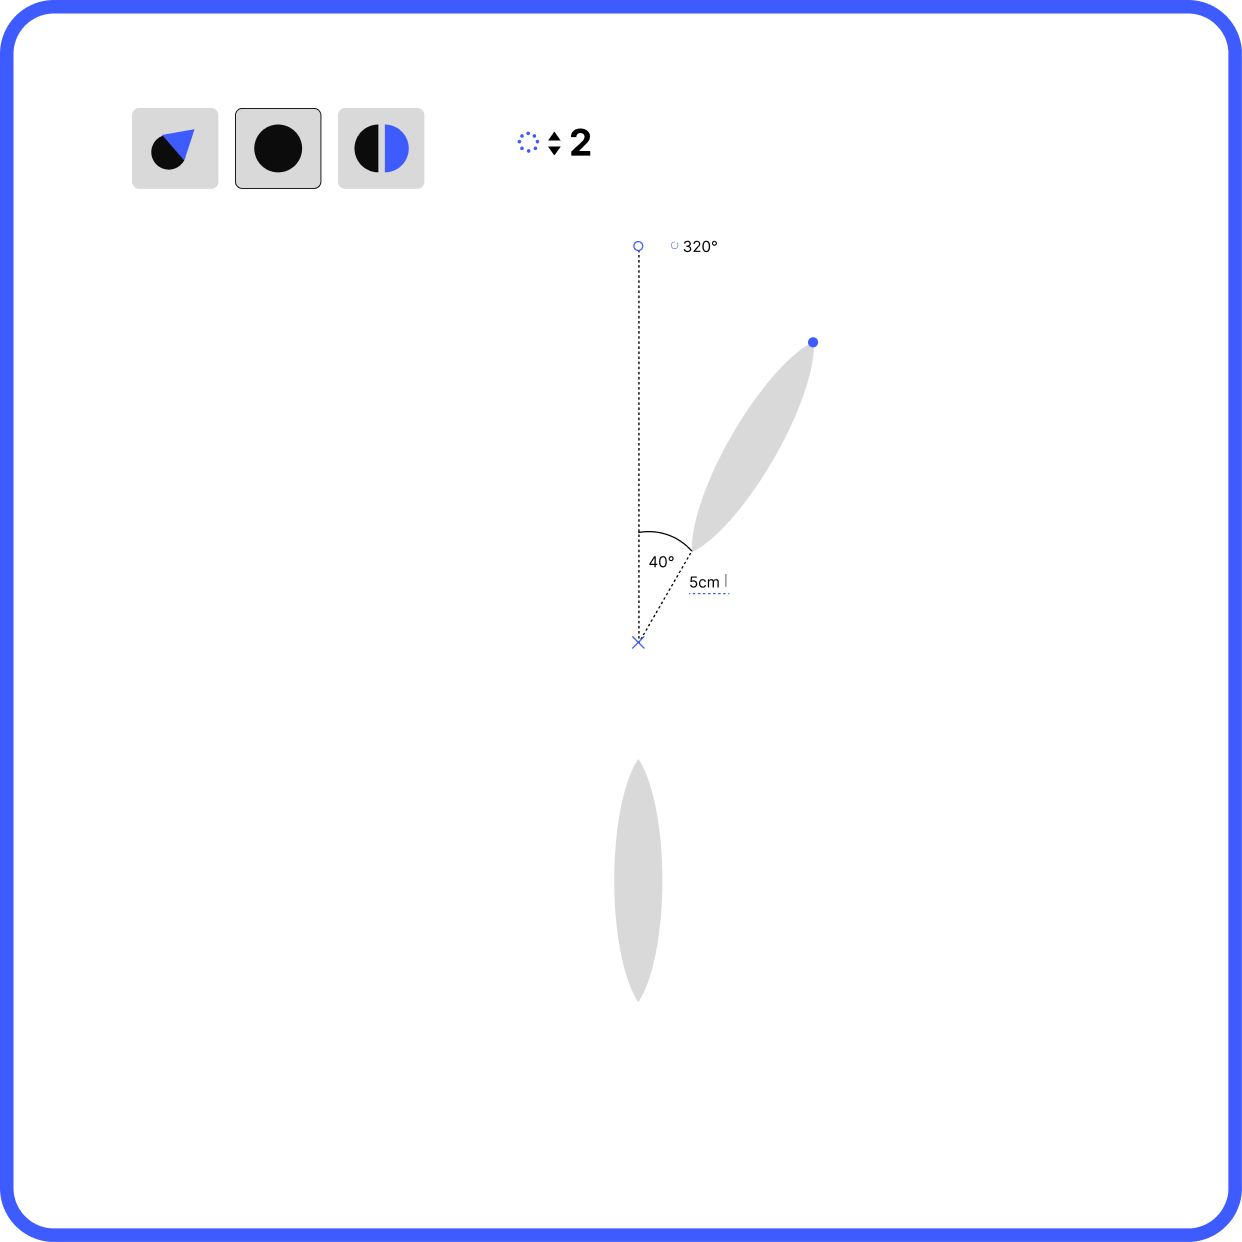
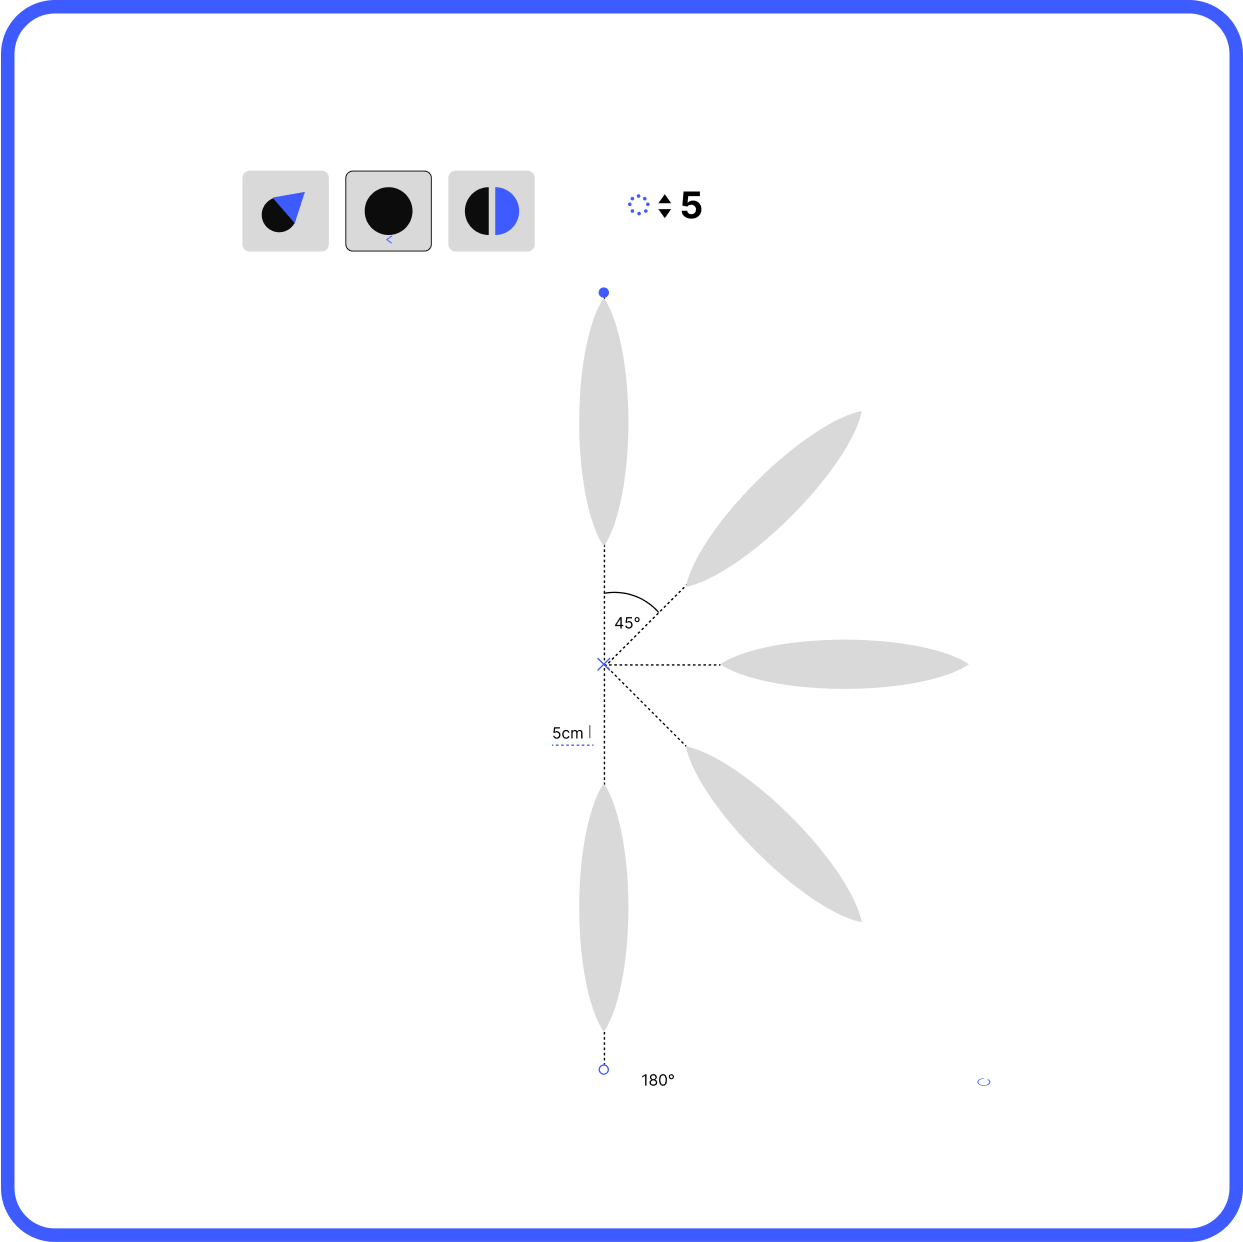
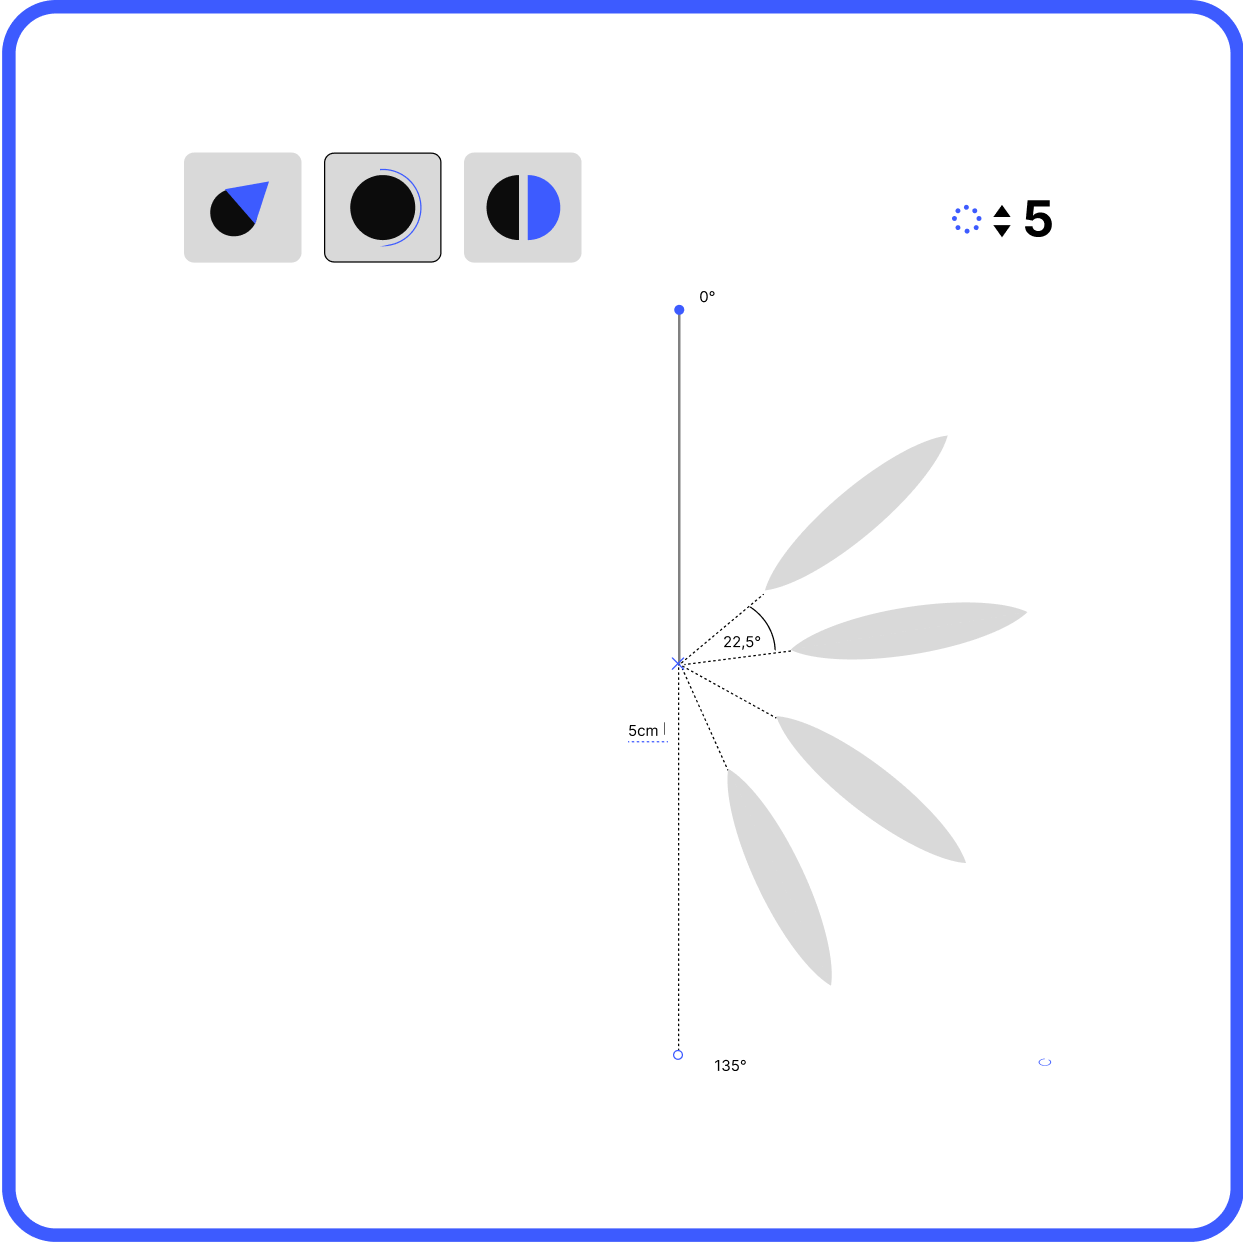
The start and end angles can be changed using a handle or an input field. This also reduces the interior angles. The start angle is always fixed. The end angle always moves dynamically with it. If the interior angles are changed, the end angle also changes.
02
/05
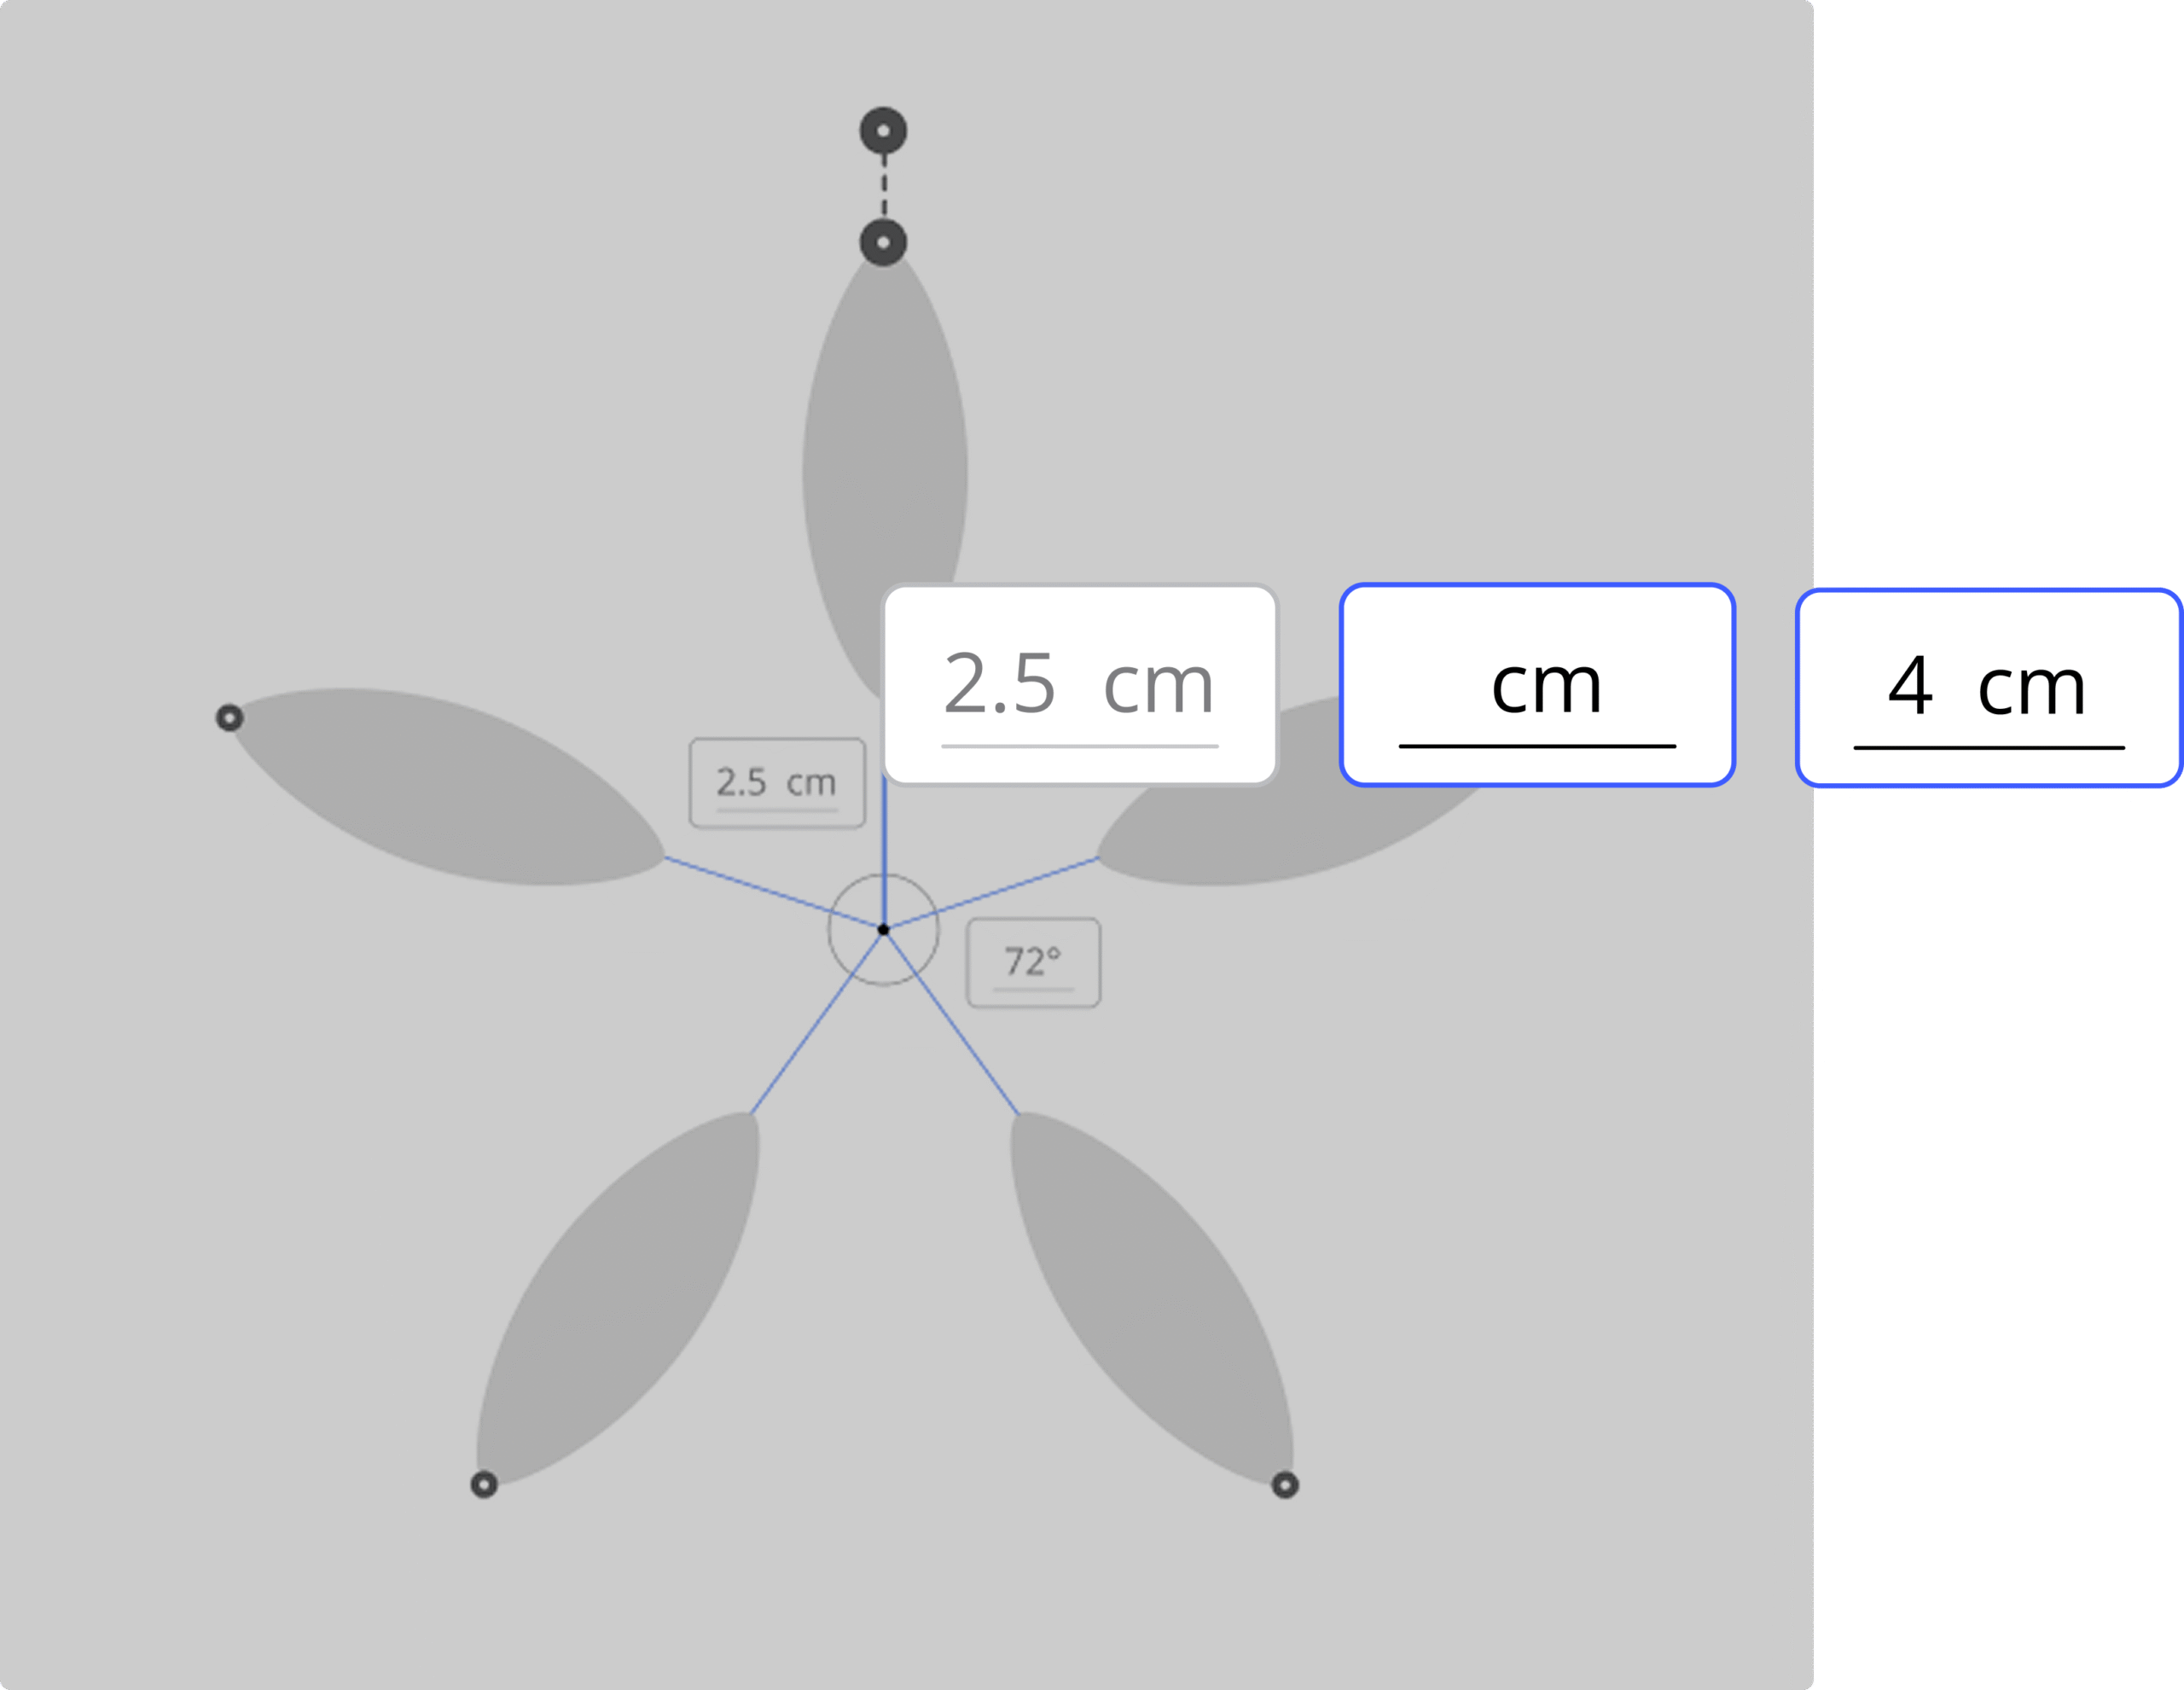
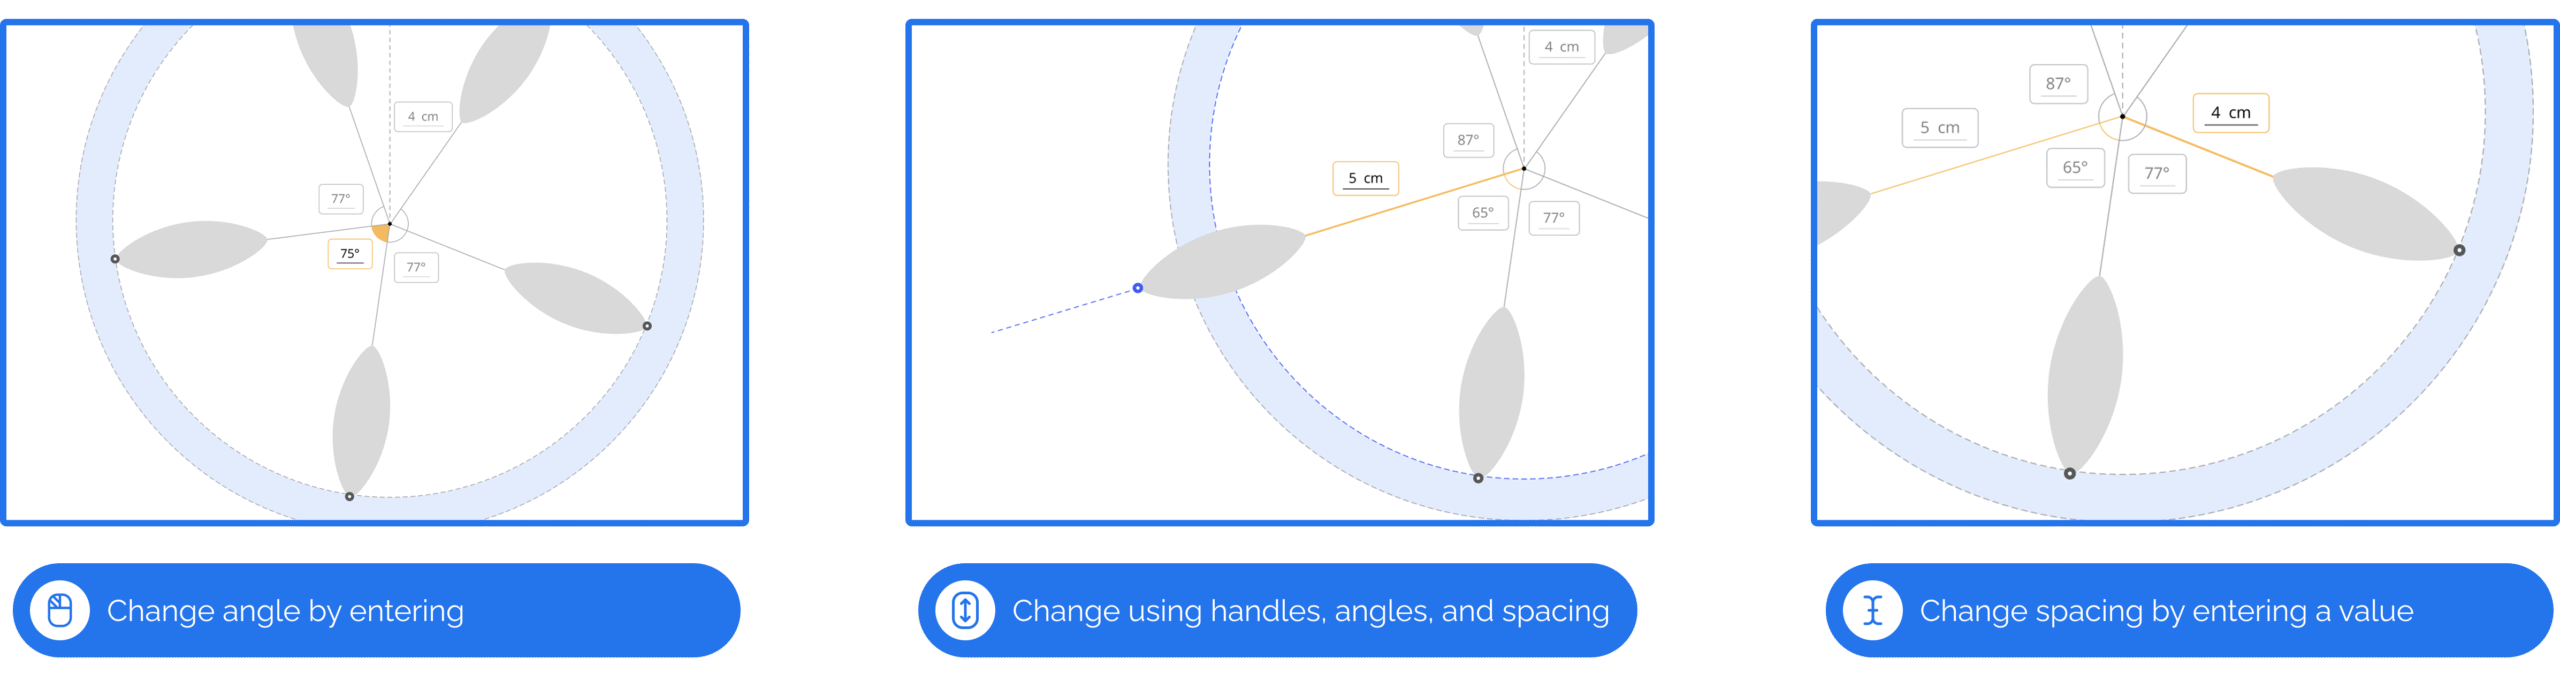
DISTANCE FROM THE CENTER
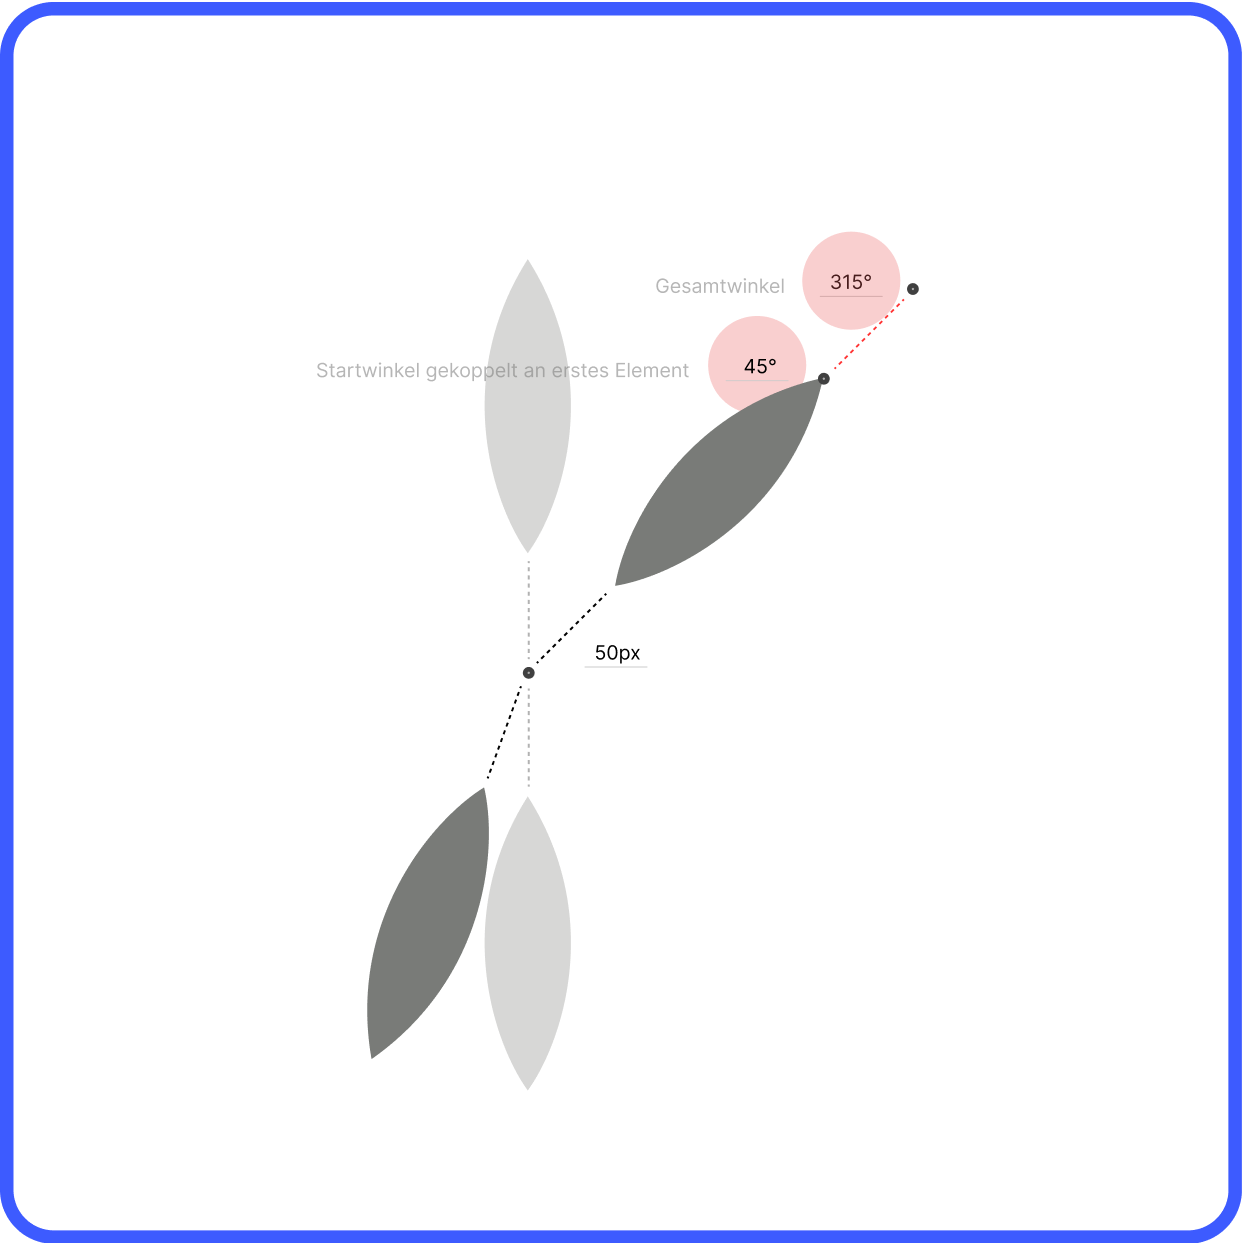
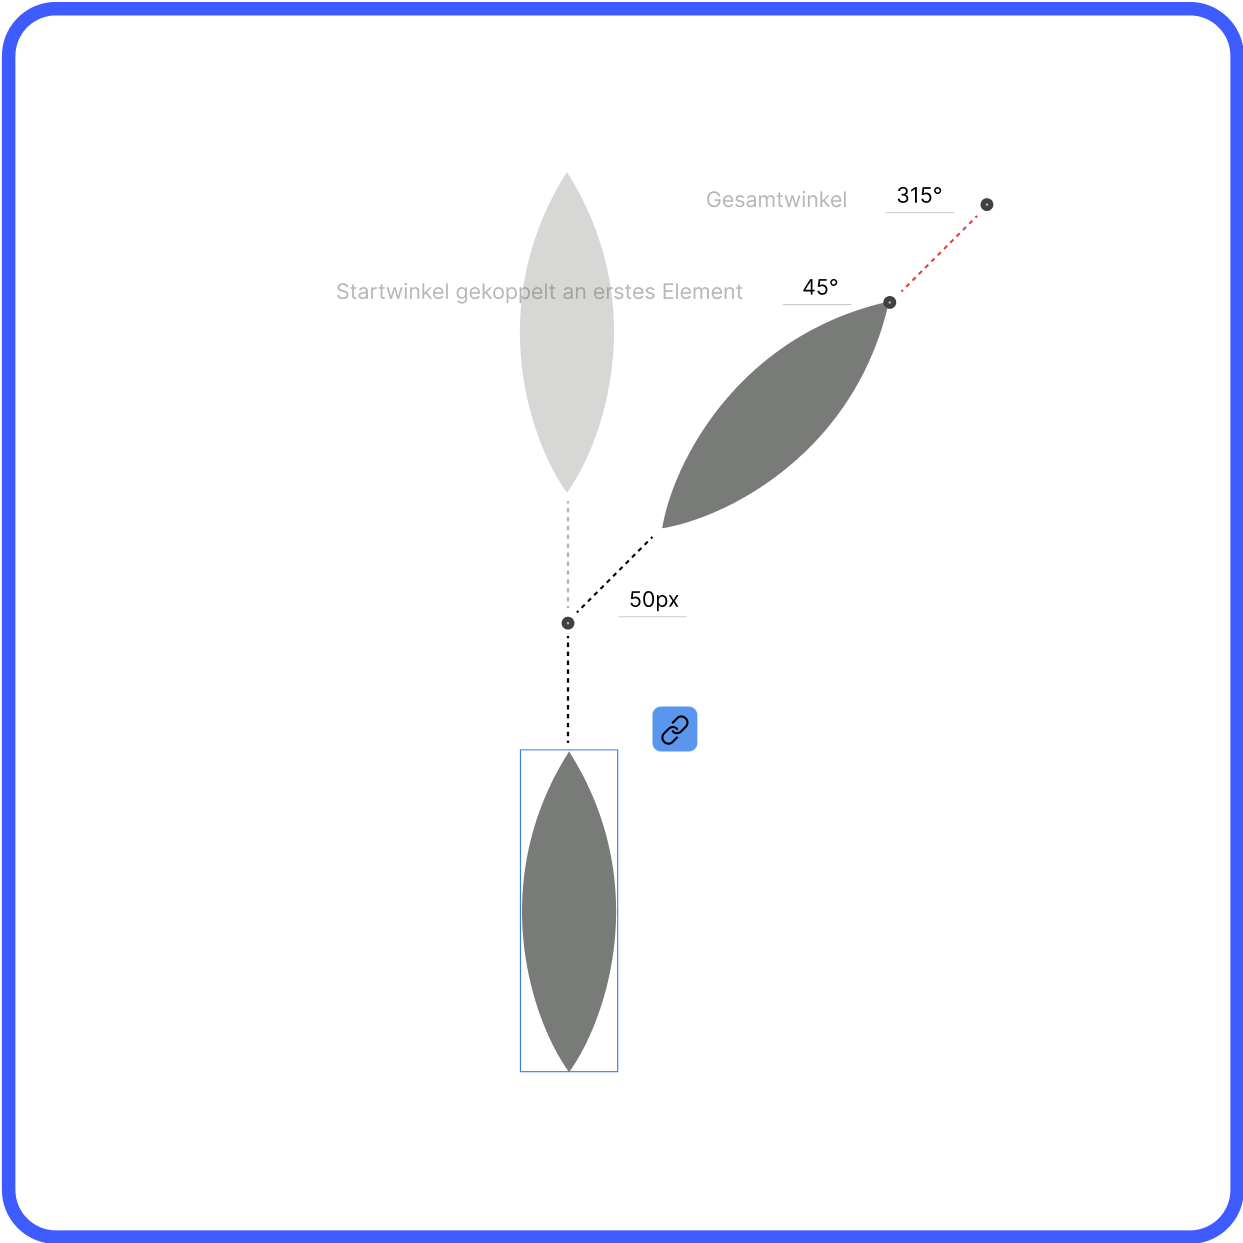
The distance to the center point can be adjusted using the input field (default: same for all elements). When changed by clicking, all linked distances are colored and changed accordingly.
03
/05
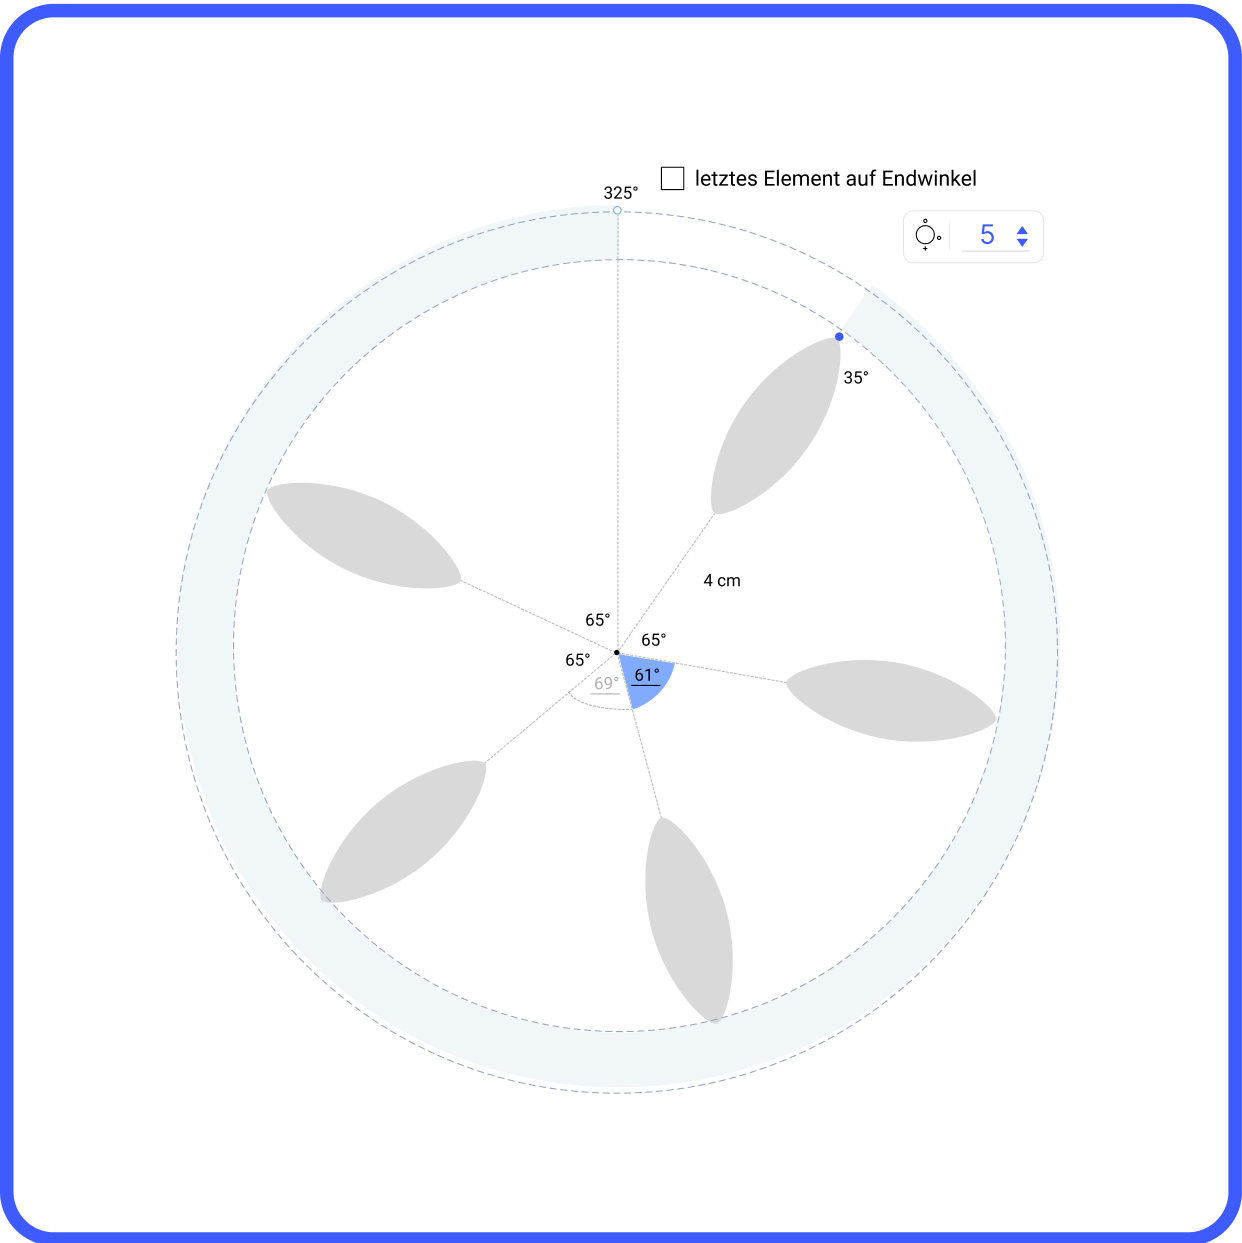
ALL ANGLES EQUAL
We have applied the principle of connected distances to the editing of angles. When an angle is clicked, connected angles are lightly colored to show that they will change at the same time when edited. Editing is done here via the input field.
04
/05
INDIVIDUAL DISTANCE / ANGLE
Double-clicking allows you to customize distances and angles. The edited distance turns orange to show the separation of linked distances. The same principle applies to angles. Handles offer more flexible editing than input fields.
05
/05
LAST ELEMENT ON END ANGLE
There is a checkbox that allows you to place an element at the end angle and thus determine exactly where the last element is located.

Illustrator introduced exactly this function 1.5 years later on 14 October 2024. So we know that the idea we had back then is actually being used in our working world and is really important.
In the end, a concept and a new function is created, which is visualized in this video.
With the help of this video we were able to make our concept easily accessible and understandable.
_____________________________________________________
WHAT DO YOU WANT TO SEE NEXT?
______________________________________________________

Younite

UnitedHands
Radial Calculator
dufte
Pal Fridge